Tools - Fretboard Radius Jig
Fretboard Radius Jig
Using the jig
- Draw a centerline on the platform where the fretboard will be held for radiusing.
- Align the centerline of the fretboard with the centerline of the platform and secure the freboard to the platform with double sided tape.
- A 1/2" straight bit works well for me.
- Position the bit height so it just grazes the edge of the fretboard.
- Make the first pass on one edge of the fretboard and then the other edge. At this bit height, only the edges of the fretboard will be cut.
- Lower the bit a little bit and make the next pass along the edges and then make subsequent passes moving toward the center of the fretboard.
- Make multiple counter-clockwise passes at different bit heights until you reach the desired height.
- If your fretboard starts out at the desired thickness, make sure that you never set the bit lower than the height of the center of the fretboard.
- Any ridges left from the straight bit can be cleaned up with additional passes at the final height and then sanded.
Blackwater River Guitars
Tools - Fretboard Radius Jig
Allows you to create a constant radius on the fretboard.
Click on any picture to see a slide show of larger images.
I saw something similar to this somewhere on the Web, but can't find the original reference. This jig is based on designs by Marty McClary and Todd Stock.
If you're going to build one of these, you can use my dimensions as a guide. You may have to make adjustments for your particular router.
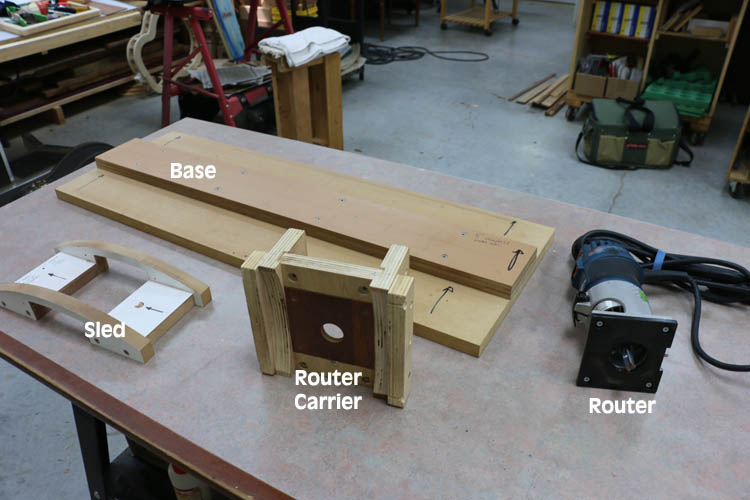
The Parts
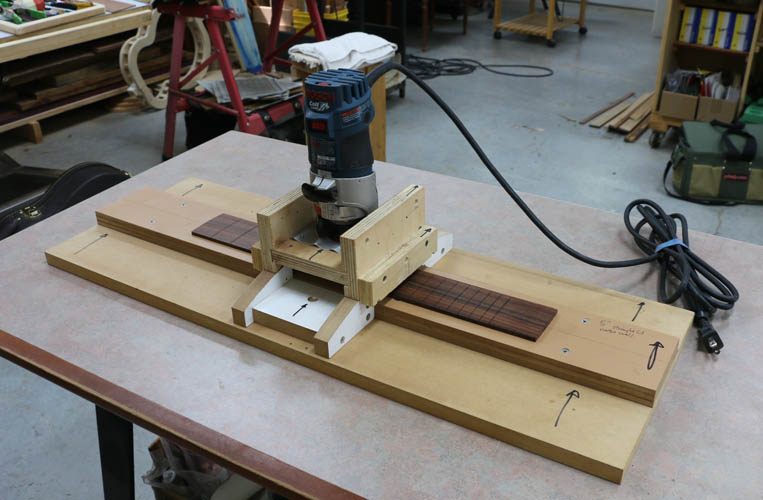
It consists of 4 parts: a base, a sled with curved rails, a router carrier that rides on the rails of the sled, and a router. I'm using a Bosch Colt router.
The base is a piece of 3/4" MDF with a platform for the fretboard. The base is 32" x 11". I built the fretbaord platform 7/8" tall from 3 pieces of laminate flooring.
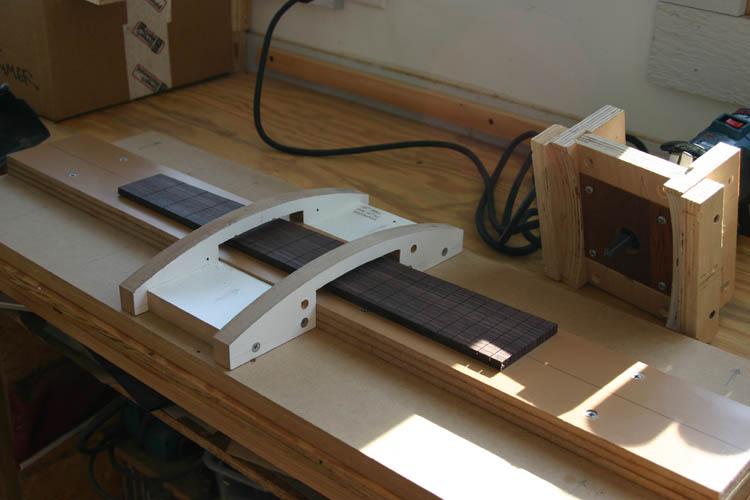
The Sled
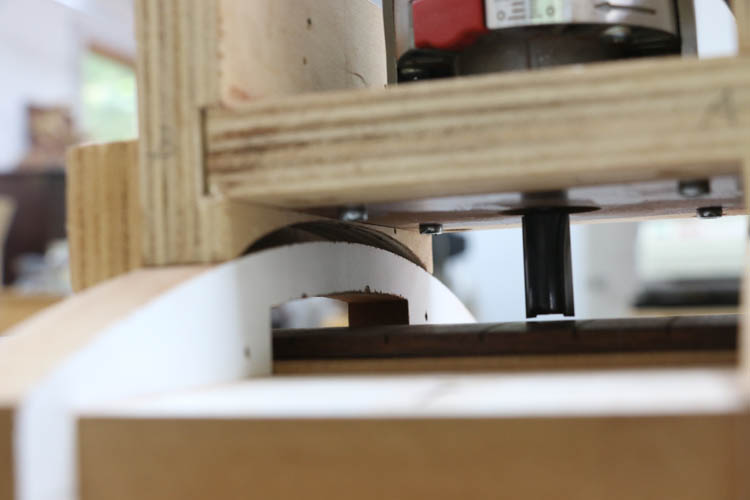
The sled has curved rails with a radius about 1" longer that the desired radius for the fretboard. This is because the tip of the router bit sits about 1" below the top surface of the rails.
.
.
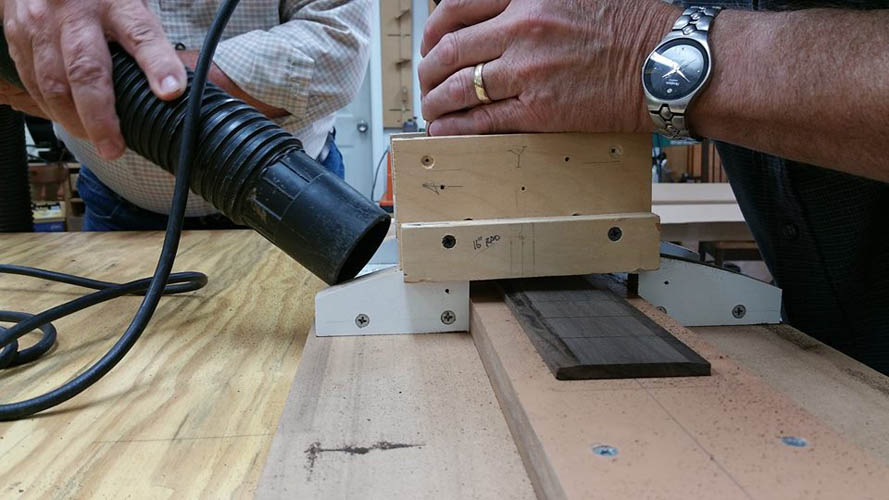
You can see the position of the tip of the router bit relative to the top of the sled rail in the photo on the left.
.
.
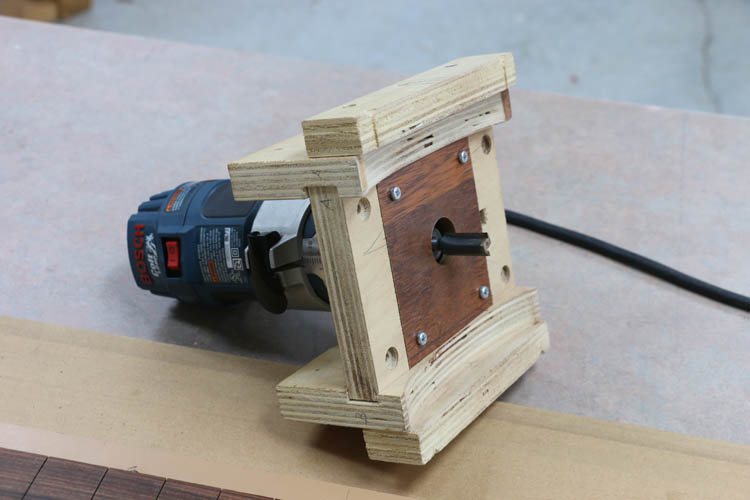
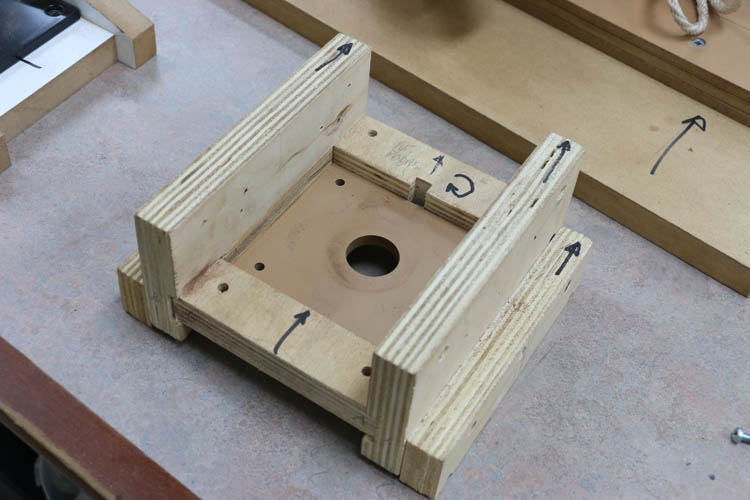
The Router Carrier
The carrier is built to hold a Bosch Colt router (laminate trimmer).
The original router base is removed and the router is attached to the new base in the carrier.
.
.
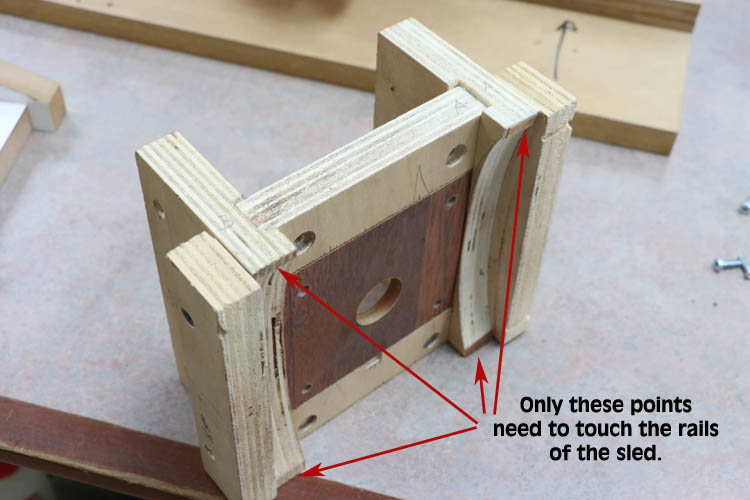
I originally thought that the two arched surfaces that ride on the rails of the sled needed to match the curve of the rails, but only the end points need to touch the rail. (See photo) It simplifies the construction and allows the carrier to be used with sleds of different radii.
In Use
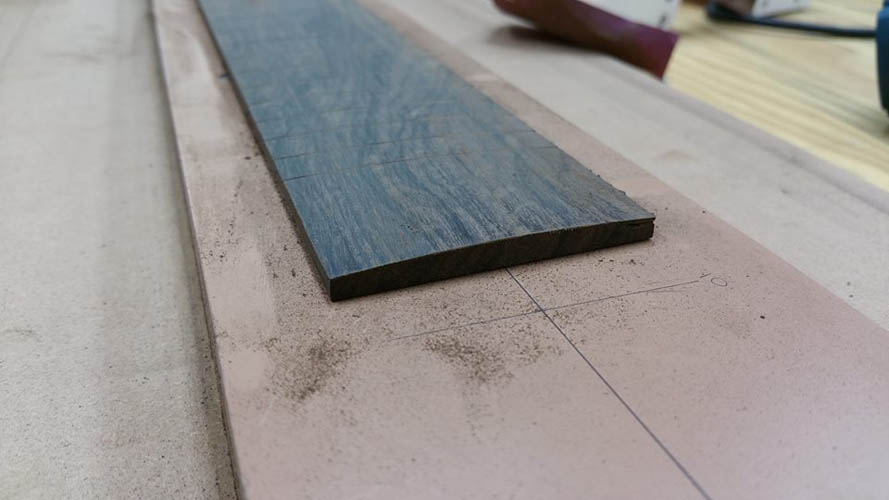
The photo below on the left shows the result after two passes. The photo on the right shows the radiused fretboard.